If you’re staring at a heavy apron-front sink and a stone countertop, you already know the margin for error is small. Here’s exactly how to install a farmhouse sink with granite in a way that won’t crack stone, fatigue the cabinet, or leave you chasing leaks a week later.
how to install a farmhouse sink with granite
Before you touch the countertop, confirm three things: your cabinet can carry the weight, your sink and faucet layout match the plumbing, and your reveal style is decided. Granite is unforgiving; once the stone is cut, you live with that decision.
Plan first: reveal style, weight, and cabinet size
Choose a reveal: positive (sink rim proud of the cutout), zero (flush), or negative (stone overhangs the sink edge). Zero or slight negative looks clean and helps control water, but needs precise templating. Farmhouse sinks are heavy—cast iron and fireclay can be 80–140 lb empty, and much more when full. Standard 36-inch sink bases often work, but apron-front models usually need the face frame trimmed and internal supports added.
If your granite is already installed, do not freehand cut it in place. Hire a stone fabricator for the opening and polish. You can do every other step yourself; the granite cut is the one that can ruin a countertop in seconds.
Tools and materials that actually work
- Measuring tape, framing square, painter’s tape, pencil
- Jigsaw/oscillating tool for cabinet trim; drill/driver
- 2x4 or 2x2 lumber for ledgers and a center cradle; construction screws
- Exterior-grade plywood (3/4 inch) for shelves or a full support deck (if needed)
- Shims (composite or hardwood), clamps, and scrap wood for temporary bracing
- 100% silicone, neutral-cure and stone-safe
- Non-staining plumber’s putty or stone-safe sealant for the drain and basket strainer
- Plumbing parts: tailpiece, P-trap, extension tube, disposal flange if applicable
- Safety gear: gloves, eye protection, helper for lifting
Prep the cabinet and dry-fit the sink
Remove doors and drawers from the sink base. Most apron sinks require lowering or cutting the top rail and part of the face frame. Mark the manufacturer’s cutout template on the cabinet, then make careful cuts. Always sneak up on the fit: remove less, test, repeat. The sink should slide in with minimal side-to-side play.
Set the sink on blocks in the opening and check the reveal. Aim for 1/16–1/8 inch even gaps around the bowl if your design calls for a slight reveal. Confirm the faucet location, soap dispenser holes, and clearance for the backsplash and window trim.

Build a real support system (the sink should not hang from granite)
Farmhouse sinks must sit on a support, not on the stone. I install two 2x2 or 2x4 ledgers on the cabinet side walls and a removable center cradle.
- Side ledgers: Level and fasten a ledger on each side with construction screws. Ledger top should sit 1/8–1/4 inch below the final sink rim height to allow fine shimming.
- Center cradle: A cross piece spanning the cabinet side to side, resting on the ledgers. Add a front-to-back stiffener if the span is wide. The sink bottom sits on this cradle.
- Optional deck: For very heavy sinks or weak cabinets, build a 3/4-inch plywood deck on cleats with a cutout for plumbing.
Dry-set the sink on the support, shim until the rim is dead level in both directions, and check your reveal against the countertop template. The sink should carry its own weight without touching the granite yet.
Coordinate the granite cut or template
If the countertop isn’t installed yet, have the fabricator template with the actual sink in place. If the granite is already in, a fabricator should cut and polish the opening onsite with water-fed tools and protect the cabinets. DIY stone cutting risks cracks, chip-out, and a lot of silica dust—don’t do it indoors.
Set the sink permanently
- Clean all contact areas: Wipe the granite underside, sink rim, and cabinet with isopropyl alcohol to remove dust and oils.
- Apply silicone: Run a small, continuous bead of neutral-cure silicone where the sink will meet the granite underside. Also add a few small dabs on the ledgers to help keep shims from slipping.
- Lower and align: With a helper, set the sink on the cradle. Align the reveal and check level. Make tiny adjustments with shims on the cradle, not by prying against the stone.
- Brace while curing: Add a temporary brace from the cabinet floor to the sink bottom if needed. Wipe squeeze-out clean.
Let the silicone set per the label—usually 12–24 hours. Don’t reconnect plumbing until the sink can’t move.
Install faucet and drain the right way
Stone-safe sealants matter. Some putties stain granite. Use a non-staining plumber’s putty or a silicone recommended for natural stone. On the faucet base, I prefer a thin bead of silicone rather than the foam gasket if the surface is slightly uneven.
- Basket strainer: Bed it in non-staining putty or stone-safe sealant. Tighten evenly and wipe clean.
- Disposal: Use the manufacturer’s flange kit; support the disposal during install so the sink isn’t stressed.
- P-trap alignment: Expect to adjust the tailpiece height. A short extension tube often solves minor misalignments without stressing the drain.
- Dishwasher and air gap: Confirm high loop or air gap routing before final connections.
, center cradle, and shims. Include dimensions (1/8 in reveal, 3/4 in plywood option). Clean lines, readable labels, neutral colors, with a small “DiyMender.online” watermark")
Seal the sink-to-stone joint
Once everything is aligned, tool a thin, continuous bead of neutral-cure silicone in the joint between the sink rim and the granite underside. Smooth with a damp finger or caulk tool. Aim for neat and minimal—thick caulk bands collect grime and are harder to refresh later.
Common mistakes I see—and how to avoid them
- Letting the stone carry the sink: Granite is strong but brittle at edges. Always build a support frame so the sink bears on wood, not on the stone.
- Skipping the dry fit: A 1/16-inch surprise becomes a long day of shimming. Dry-fit with the real sink and check faucet clearance.
- Using the wrong sealant: Acetoxy silicones can etch or stain natural stone. Use neutral-cure, stone-safe products.
- Forcing plumbing into place: Misaligned traps leak and stress the basket strainer. Use extensions and adjust the wall arm height if needed.
- Cutting granite without containment: Dry cutting inside fills a home with silica dust. Leave stone cutting to a fabricator with water-fed tools.
Edge cases worth planning for
- Small sink base (33-inch): Consider a shorter bowl or modify interior rails. Check door hinge clearance against the apron.
- Old cabinets with sag: Add a center support post to the cabinet floor or a plywood deck to distribute weight.
- Thick apron sinks: Some aprons project beyond the counter plane; make sure the cabinet doors don’t hit the apron.
- Positive reveal by design: Great for wiping crumbs into the sink, but it exposes the sink rim—choose a sink with a finished edge.
When a pro is the smarter call
Two moments to consider hiring out: cutting/polishing the granite, and handling very heavy sinks (cast iron or double bowls) where one slip can snap a cabinet rail or chip the stone. Also call a plumber if your trap arm height in the wall needs to be moved; it’s a clean fix with the right tools, but frustrating without them.
Final checks before you call it done
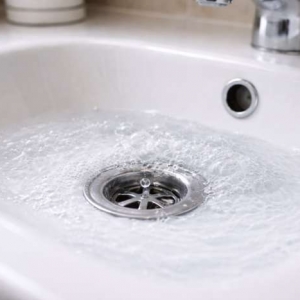
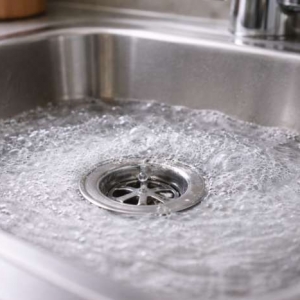
- Fill the sink and let it sit 15 minutes; check every joint for weeping.
- Run the disposal under load while supporting it by hand; listen for vibration that might indicate misalignment.
- Inspect the silicone joint with a flashlight; add a second thin pass if you see gaps.
Maintenance so it lasts
Re-caulk at the first sign of gaps or mildew—small repairs are easy if you catch them early. Wipe up standing water near the apron corners; these are the first places finish wears. For granite, stick to pH-neutral cleaners and keep it sealed per your fabricator’s schedule.
Quick step-by-step recap
- Measure, choose reveal, confirm cabinet strength
- Trim cabinet face and internal rails as needed
- Build ledgers and a cradle; dry-fit and shim
- Have granite templated/cut by a fabricator
- Silicone, set sink, brace, and let cure
- Install drain, faucet, disposal; align plumbing
- Seal the sink-to-stone joint and leak-test
Take your time on the support and layout. If your cabinet holds the weight and your reveal is even, the rest is straightforward and durable.