If you’re sorting out how to choose a kitchen sink, start with how you use your kitchen day-to-day, then work backward to size, material, and installation. Looks matter, but a sink that drains well, resists damage, and actually fits your cabinet will save you money and frustration.
Quick answer
Measure your base cabinet and existing cutout first. Pick a material that matches how rough you are on gear (stainless for durability, composite for quiet, fireclay for classic). Choose a bowl layout that fits your routine (single for big pots, double for multitasking). Match mounting style to your countertop (undermount for stone, top-mount for laminate). Confirm faucet holes, disposal, and accessories. Buy once, install once.
What really matters before you shop
Most sink regrets come from missing a constraint. I’ve seen gorgeous, heavy basins returned because they didn’t fit the cabinet, or they needed a faucet with fewer holes. Take 10 minutes to check these first:
- Base cabinet width (outside and inside)
- Existing countertop cutout (if replacing only the sink)
- Countertop material (laminate vs. stone affects mounting)
- Plumbing location and garbage disposal clearance
- Faucet and accessory hole count (soap dispenser, RO faucet)
- Dishwasher air gap requirements in your area
, Composite (dark gray), Fireclay (white apron front), and Cast Iron Enamel (glossy). Include small callouts for pros/cons like \"durable,\" \"quiet,\" \"heavy,\" \"needs sealing\" where appropriate. Clean workshop lighting, watermark \"DiyMender.online\" in the lower-right.")
Measure for fit and sanity
Cabinet size limits sink size. A 36-inch sink base usually fits a 33-inch sink. A 33-inch base typically fits a 30-inch sink. Check the inside rails; some cabinets lose an inch or two to thicker walls or pullouts. Depth front to back matters too—leave room behind the sink for faucet holes and supply lines.
If you have laminate countertops, a top-mount (drop-in) makes life easier and protects the particleboard from water. For stone or solid surface, undermount is common and easier to keep clean, but it needs strong support and a pro cutout.
Materials: pros, cons, and who they suit
Stainless steel
My go-to for busy kitchens. It’s light, easy to install, and forgiving with dropped dishes. Look for 16–18 gauge; anything thinner will drum and dent easier. Brushed finishes hide scratches better than polished. Add sound-deadening pads if not included.
Granite/composite (quartz composite)
Quiet and tough with a matte look. They resist scratches and stains better than cheap stainless, but can show mineral deposits—keep a squeegee handy. Dark colors hide marks but reveal limescale; lighter colors are the opposite.
Fireclay or cast iron enamel
Classic farmhouse look, heavy, and very durable. The glazed surface is smooth and easy to clean, but can chip if hit hard with cast iron pans. Weighs a lot—plan for cabinet reinforcement and careful installation.
Solid surface/other
Seamless looks with matching counters are nice, but watch heat limits and staining. Usually installed by a countertop fabricator.

Bowl layout and size
Layout changes how you work. Choose what matches your routine, not trends.
- Single bowl: Best for sheet pans and stock pots. Less partition means easier scrubbing.
- 50/50 double: Good for wash/rinse workflows or separating prep and dirty dishes.
- 60/40 offset: A nice compromise—large bowl for pans, small for prep or a colander.
- Workstation sinks: Built-in ledges for cutting boards and racks. Great in small kitchens.
Depth matters. Eight inches is standard; nine or ten gives space for tall pots but can strain your back and splash less. If you’re short or have deep counters, try a cardboard mockup to feel the reach. Shallow bowls pair better with low-arc faucets to control splash.
Mounting types and reveals
Top-mount (drop-in)
Easiest install, especially on laminate. The rim protects the edge from water. Slightly harder to wipe crumbs straight into the sink. Budget-friendly and forgiving.
Undermount
Clean wipe-in look. Requires a sturdy countertop and proper support brackets or rails. You’ll choose a reveal: zero (edge flush), positive (counter overhangs sink), or negative (sink lip under counter). A small positive reveal helps you see and clean the joint; zero looks slick but demands a perfect stone edge.
Apron-front (farmhouse)
Exposed front. Comfortable to work at and reduces counter reach, but demands precise cabinet cuts and often a special base. Measure twice and dry-fit; some models slide-in, others need a custom cradle.
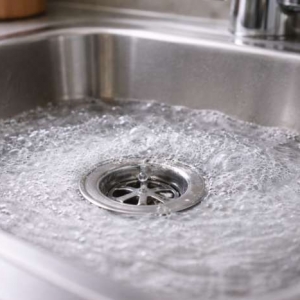
Drain position, slope, and noise
Rear drains free up space under the sink for a pull-out trash or large disposal and keep the drain away from where pans sit. Good basins have gentle corners and noticeable slope to the drain—water shouldn’t puddle. If shopping in person, tip a cup of water in and watch it travel.
For noise, heavier materials and undercoating help. With stainless, look for thick gauge and full-coverage pads, not tiny stickers.
Faucets, holes, and accessories
Count the holes you need: faucet, sprayer, soap dispenser, air gap, filtered water tap. Many sinks ship undrilled (composite/fireclay) or with multiple knockouts. Match the faucet base (single-hole vs. 3-hole) to the sink. If you’re installing a disposal, confirm basket strainer compatibility or choose a disposal flange in the matching finish.
Accessories that actually earn their keep: a roll-up drying rack, a fitted cutting board that slides, and a bottom grid to prevent scratches and improve drainage. Skip gimmicks that crowd the basin.
Budget ranges that track with quality
- Stainless: Solid everyday options start around mid-range pricing; premium gauge and sound deadening cost more.
- Composite: Mid to high; good ones feel dense and come with cut templates and clips.
- Fireclay/Cast iron: High; budget extra for shipping and installation help due to weight.
Don’t forget extras: new trap parts, disposal flange, mounting hardware, silicone, plumber’s putty, and a faucet if you’re upgrading.
Installation notes from the field
- Dry-fit everything. Check that the strainer and disposal clear the back of the cabinet and any drawers.
- Shut off water and power to the disposal before starting. Safety first.
- Use a ledger board or brackets to support heavy sinks while sealing and clipping.
- Run a thin, continuous bead of 100% silicone under the rim (drop-in) or at the flange (undermount). Wipe squeeze-out immediately.
- On undermounts, recheck clip tension the next day after silicone cures.
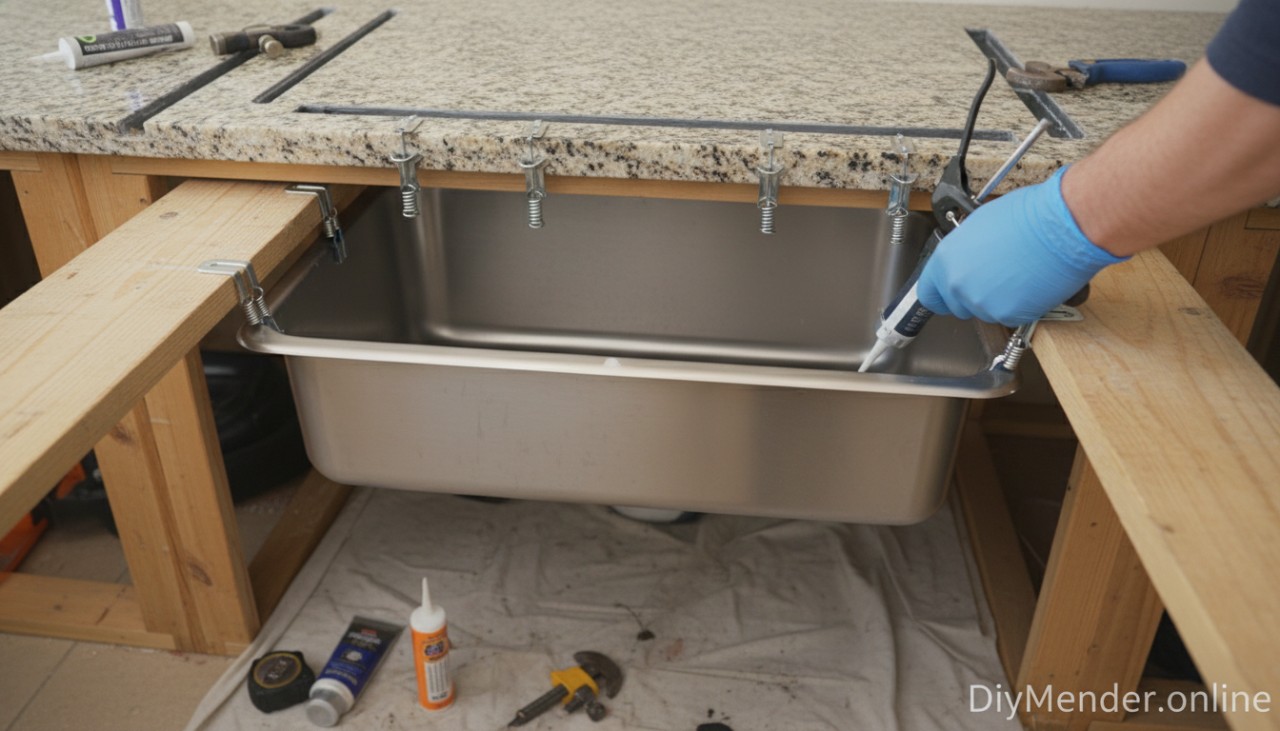 undermount sink installation in progress: sink supported by temporary ledgers, clamps/clips visible, silicone bead being applied, plumber’s tools nearby. Clear view of stone countertop underside and support rails. Watermark "DiyMender.online" in the lower-right." title="Photo of an undermount sink installation in progress: sink supported by temporary ledgers, clamps/clips visible, silicone bead being applied, plumber’s tools nearby. Clear view of stone countertop underside and support rails. Watermark "DiyMender.online" in the lower-right." class="overly-article-img">
How to choose between close contenders
When two sinks seem equal, use tie-breakers:
- Comfort test: Simulate scrubbing a sheet pan. If your knuckles hit the divider, pick a single bowl.
- Cleaning: Tighter corners look sleek but are harder to wipe. Look for 10–15 mm corner radii for easy maintenance.
- Underside pads: More coverage equals less noise.
- Template and hardware: A real cutout template and solid clips save time and headaches.
When to call a pro
Hire help when cutting stone, modifying cabinets for an apron-front, moving plumbing or electrical, or if you’re unsure about supporting a very heavy sink. A small mistake with stone or support can be costly.
Long-term care and prevention
- Use a bottom grid to prevent scratches and improve drainage.
- Rinse and squeegee after heavy use to reduce mineral buildup and stains.
- Avoid harsh abrasives on enamel and fireclay; use non-scratch pads.
- For composite, keep a mild vinegar solution for limescale and a baking-soda paste for marks.
- Check caulk lines annually; recaulk at the first sign of gaps.
FAQ
What size sink fits a 36-inch cabinet?
Most often a 33-inch wide sink. Always verify the interior width and any drawer or rail intrusions.
Is a single or double bowl better?
Single if you handle big cookware or bake a lot. Double if you hand-wash often or like a dedicated prep/soak space.
Do I need an undermount for resale value?
No. A well-chosen top-mount looks clean and performs great, especially on laminate. Buyers care more about condition and function than the mounting style.
Will a thicker stainless sink be quieter?
Yes, thicker gauge plus full-coverage pads and undercoat noticeably reduce noise and vibration.
Can I add a garbage disposal to any sink?
Usually, as long as the drain opening is standard (3.5 inches) and there’s clearance in the cabinet. Check for rear-drain models to free up space.
Take your time with measurements, pick what fits your routine, and don’t be shy about returning a sink that looks good but puddles or feels flimsy. You’ll use this fixture every day—choose the one that makes daily cleanup easier, not harder.