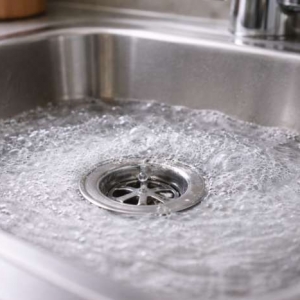
If you need to know how to unclog a sink with hair, here’s the fast method that actually works: remove the pop-up stopper, hook out the hair wad, then flush. If it’s still slow, seal the overflow and plunge, or use a wet/dry vacuum. Only if that fails, open the P-trap. This sequence works because hair usually tangles at the stopper or right below it; mechanical removal is immediate, while liquids struggle to dissolve dense, soapy hair mats.
Quick Steps (Best Order)
Pull the stopper: Twist and lift. If it won’t lift, loosen the retaining nut on the back of the drain tailpiece under the sink and disconnect the pivot rod to free the stopper.
Hook the hair: Use a plastic hair snake, a barbed zip tie, or needle-nose pliers to grab hair and gunk. Repeat until clean.
Flush: Run hot tap water for 1–2 minutes. Avoid boiling water on porcelain or PVC.
Plunge properly: Block the overflow hole with a wet rag, cover the drain with a cup plunger, fill with enough water to cover the cup, then plunge 10–15 firm strokes.
Wet/dry vac option: Seal the overflow with a rag, make a tight seal at the drain, set vac to “wet,” and pull the clog out.
Open the P-trap (last resort): Place a bucket, loosen slip nuts, remove trap, clean, and reassemble with the washers oriented correctly.
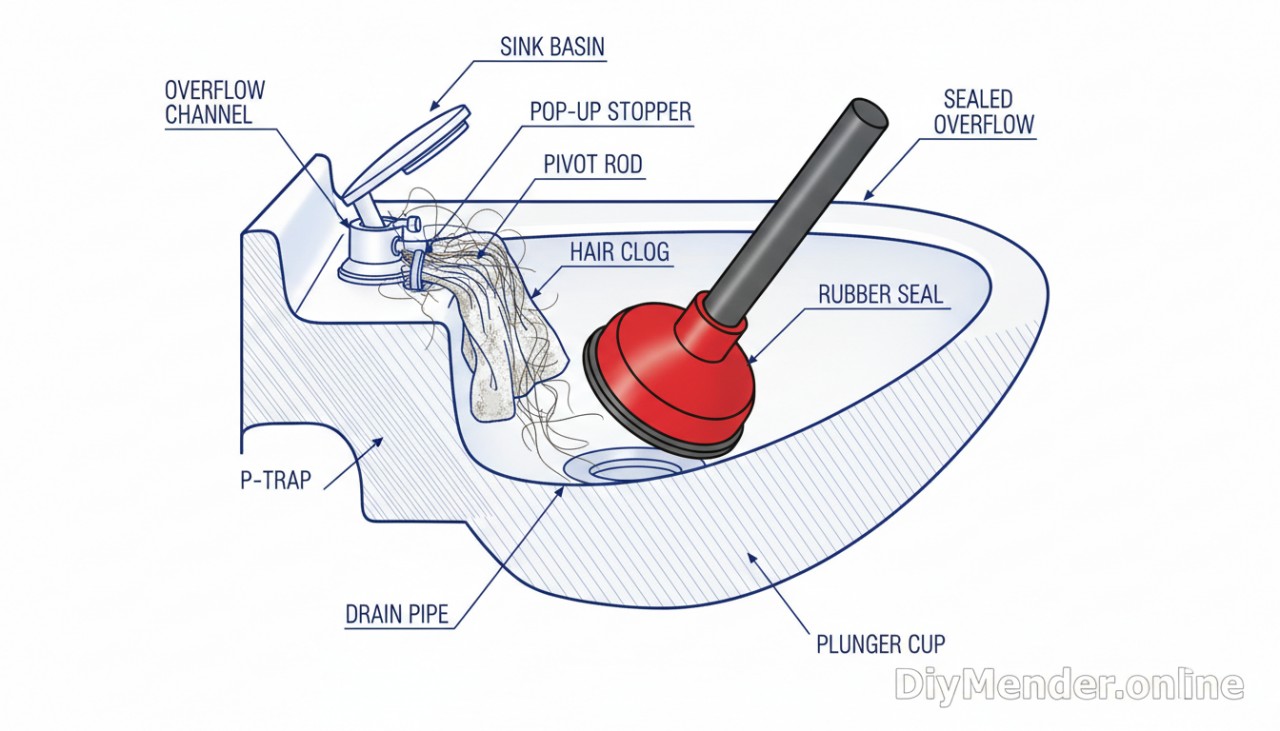 bathroom sink pop-up, hair snagged at the pivot rod, overflow being sealed with a rag, and a cup plunger in use. Label parts. Include DiyMender.online watermark." title="A cutaway diagram showing a bathroom sink pop-up, hair snagged at the pivot rod, overflow being sealed with a rag, and a cup plunger in use. Label parts. Include DiyMender.online watermark." class="overly-article-img">
Why These Steps Work (and Liquids Often Don’t)
Hair rarely travels far; it snags on the stopper linkage and rough spots inside the tailpiece where soap scum and toothpaste act like glue. Mechanical removal breaks that tangle instantly. Plunging works by pressure changes that dislodge soft accumulations. Wet/dry vacs overcome resistance with strong suction. Chemical cleaners can dissolve hair, but they’re slow, hazardous, and often can’t penetrate a dense, greasy mat before cooling or neutralizing. Enzyme cleaners are safer, but they’re maintenance-grade, not instant fixes.
Detailed DIY, With Pro Tips
1) Remove and Clean the Stopper
Under the sink, find the small pivot rod entering the back of the drain tailpiece. Loosen the retaining nut by hand or with pliers, slide the rod out, and lift the stopper. Clean the hair and gunk from both the stopper head and the pivot rod; that’s the usual snag point. Reinstall with the clevis clip, and tighten the nut snug, not overtight.
2) Fish Out Remaining Hair
Insert a plastic barbed tool or a bent zip tie and twist as you pull. Work 3–6 inches down. If you hit a hard stop immediately, you might be contacting the trap bend—don’t force; you’re fishing, not drilling.
3) Plunge With the Overflow Sealed
The overflow is the hole inside the sink near the rim. If it’s not sealed, a plunger just moves air through it instead of the clog. Use a wet rag to block it tightly. A cup plunger (flat bottom) is correct for sinks; add enough water to cover the cup so you’re moving water, not air.
4) Wet/Dry Vac Extraction
This shines on stubborn hair mats. Wrap the hose end with a cloth to cushion the sink, hold it firmly over the drain to get a seal, and pull the trigger. Expect a nasty blob; capture it in the vac, then rinse the sink and hose.
5) Clean the P-Trap If Needed
Place a bucket, loosen the two slip nuts, and remove the trap. Clear the trap and check the trap arm toward the wall. Reassemble with the beveled side of washers facing the joint, and hand-tighten plus a small nudge with pliers—over-tightening distorts washers and leaks later.
Mistakes That Make Things Worse
Pouring chemical drain cleaner first: It can make mechanical work dangerous and may sit on chrome, nickel, or porcelain and cause damage.
Plunging without sealing the overflow: You’ll just exchange air.
Using the wrong plunger: Toilet flanges leak on sinks; use a flat cup plunger.
Forcing a metal snake in delicate traps: Thin bottle traps or chrome traps can dent, scratch, or leak.
Over-tightening slip nuts: Cracked nuts, warped washers, and slow leaks are common results.
Boiling water in bathroom sinks: It can craze porcelain and soften PVC or ABS fittings.
Edge Cases and Limits
Double-bowl vanity or shared drain: One side may push into the other. Plug the other drain and seal both overflows before plunging.
Pop-up won’t release: The pivot rod ball or the stopper post may be corroded. Penetrating oil and patience help; worst case, replace the tailpiece and stopper assembly.
No visible overflow: Some modern sinks hide it; check underside. If truly absent, plunging can be stronger—go gentler to avoid blowing out seals.
Recurring clogs: The stopper’s post or the tailpiece interior may be rough or pitted. Replacing the tailpiece and stopper often ends the cycle.
Septic systems: Avoid harsh chemical drain cleaners; prefer mechanical and enzyme maintenance.
Do Drain Cleaners Ever Make Sense?
For hair, caustic or oxidizing cleaners can work but are a last resort. They’re heat-generating, can etch finishes, and complicate later repairs. If you try one: use minimal amounts on a completely dry drain, give it time per label, then flush thoroughly. Never mix products, never plunge after adding chemicals, and wear gloves and eye protection.
Prevention That Actually Works
Install a hair catcher basket or screen you can lift and wipe daily.
Keep the stopper opening height adjusted so water (and small strands) flow freely.
Monthly enzyme treatment to digest biofilm so hair doesn’t glue together.
Rinse after shaving or hair styling to clear product residue.
When to Call a Pro
If multiple fixtures are slow, you get recurring clogs within weeks, you see leaks or corrosion at the trap, or the blockage is beyond the trap arm into the wall, it’s time for a plumber. They’ll use a proper hand auger or mini-jeter and inspect the condition of your drain assembly.
Bottom line: most hair clogs are a five- to fifteen-minute fix with a stopper pull, hair hook, and proper plunging. Start mechanical, stay safe, and you’ll almost always win without chemicals.